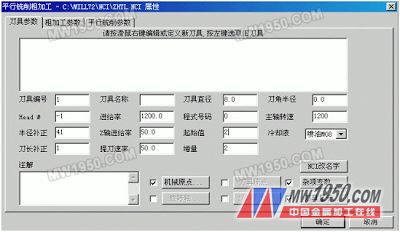
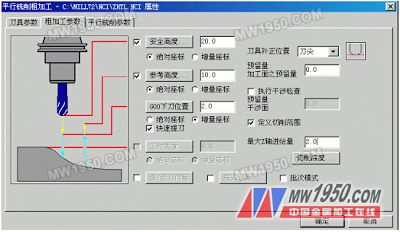
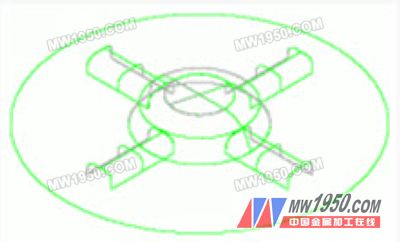
43) Click in the toolbar Figure 19 44) Click Z: 0.000 in the sub-function area and enter the Z-axis depth "-15"; 45) Click back to the main function table, click C drawing, A arc, R point radius circle in the main function area, enter the center coordinate "0,0", radius "80", the result is shown in Figure 20; Figure 20 46) Click in the toolbar 47) Click back to the main function table, click M trimming, B interrupt, 2 2 breaks, and interrupt the circle with radius "80" at the quarantine; 48) Click back to the main function table, click C drawing, U surface, E straight surface, select two semicircles, click D to execute, D to execute; 49) Click in the toolbar Figure 21 2, generate tool path 50) Click back to the main menu, click T tool path, U surface machining, R rough machining, P parallel milling, enter the file name in the pop-up dialog box and save it; 51) Click A, U surface, D to execute, pop up and set the parameters according to Figure 22. Figure 22 52) Click the roughing parameter and set the parameters as shown in Figure 23. Figure 23 53) Click on the parallel milling parameters and set the parameters as shown in Figure 24; Previous page next page 9006(Hb4) Led Headlight,Hb4 Led Headlight,9006 Led Headlight,Hb4 Headlight CHANGZHOU CLD AUTO ELECTRICAL CO.,LTD , https://www.cld-led.com , the angle of view is set to an isometric view, the result is shown in Figure 19;
 with
with ![]() , setting the viewing angle and the composition surface as top views;
, setting the viewing angle and the composition surface as top views;  , set the angle of view to an isometric view, as shown in Figure 21;